26
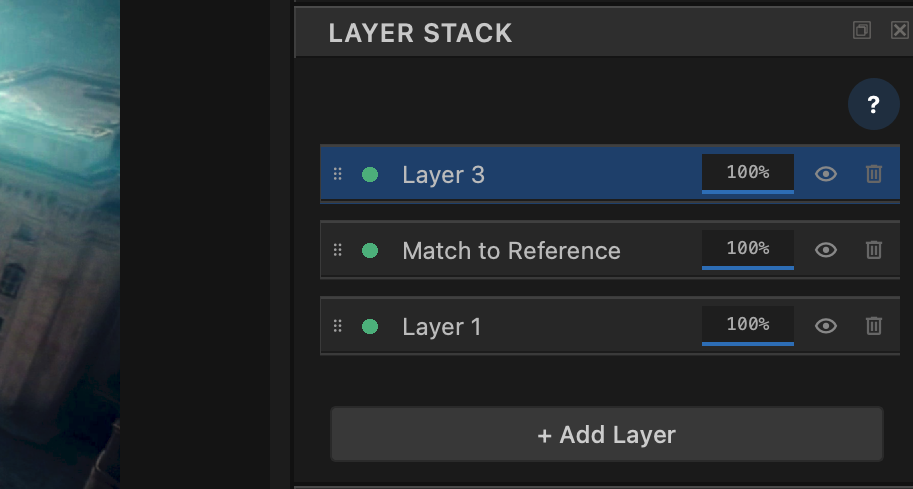
Flexibility is the operating word. Grade everything on one layer — or divide the image as granularly as you want. The Layer Stack supports either way. How you work is entirely up to you.
Each clip carries an ordered Layer Stack evaluated bottom-up in ACEScg. A layer is one non-destructive correction: any combination of the Color kit (primaries, look, tonal shaping, tone curve), plus an optional qualifier / geometric shapes matte, plus opacity · Color Grading · Masking.
Nothing is baked until export. Reorder rows, rename them, enable or disable with the eye, scrub opacity. The stack is there so you can keep decisions separate when you choose to — not because the system forces a recipe.
Same tools either path. The difference is how much independence you want between decisions.
Put balance, look, curve, and a mask on a single row when the shot is simple — or when you want speed. Full Color panel, one Active Layer, done.
Split balance from skin, skin from sky, sky from a Curve Layer. Each row can carry its own mask and opacity so local work stays independent and revisable.
One possible path on a talking-head plate. Stop wherever the picture is right — or keep splitting when a scrubber starts fighting the rest of the frame.
You might use two layers. Or five. Or stay on one. Flexibility — the stack expands with the image’s needs, not with a mandated structure.
List index 0 is the base (bottom of the UI). Enabled layers run in list order. Disabled layers are skipped.
Not “layer types” — tools available on a row. Use as many or as few as the task needs. The Color panel always shows EDITING: [layer name] for the selection.
| On the row | Detail |
|---|---|
| Color kit | Lift · Gamma · Gain · Offset (+ RGB); Brightness · Contrast · Saturation · Hue; Shadow lift · Highlight rolloff · Blend; optional tone-curve points · Color Grading |
| Mask | Optional qualifier + geometric shapes (Add / Subtract). Analytical, frame-stable · Masking |
| Opacity | 0–100% blend toward the image entering the layer |
| Enable | Eye on / off — skip processing without deleting the row |
| Order | Drag to reorder; later layers see earlier results (bottom-up) |
| Curve Layer | Optional dedicated row (+ Curve Layer) focused on the Curve dock — still has opacity and its own mask |
Tone curve points can live on any standard layer. Use + Curve Layer when you want contrast as a separate, stackable decision — same flexibility philosophy.
Keep the curve on Layer 1 if that’s simpler. Or add a Curve Layer so you can mask it, opacity it, reorder it, and disable it without touching the Color numbers beneath.
Again: entirely your call.
| Mode / action | What it does |
|---|---|
| Source | Unprocessed clip — stack peeled back |
| Active Layer | Cumulative result from the base through the selected layer (inclusive) |
| Final Output | Full enabled stack — what export uses for color (Effects sit after the stack) |
| Active Mask | Selected layer’s qualifier / shape matte |
| Match to Reference | Writes an ordinary editable global layer (per-channel LGGO) — reorder, opacity, disable, remask · Color Match |
Start simple. Split when you want more control. The stack scales with you — not the other way around.